Photoshop�����S���|�����w�֡�Ӣ��(2)
����Դ�� Tutsplus.com�����x���� Rose �o�҂����������ʵ����£�4. How to Work With a 3D Scene
Step 1
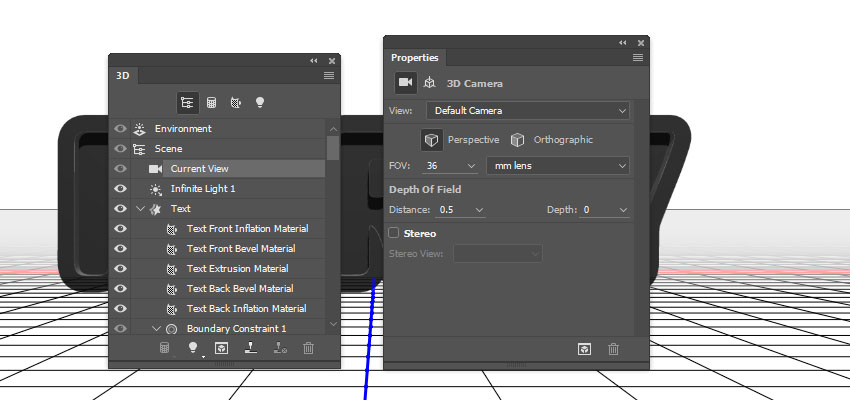
To access the 3D mesh settings and properties, you’ll need to open two panels: the 3D panel and the Properties panel (both found under the Window menu).
The 3D panel has all the components of the 3D scene, and when you click the name of any of those, you’ll be able to access its settings in the Properties panel. So make sure to always select the tab of the element you want to modify in the 3D panel before you change its settings in the Properties panel.
Step 2
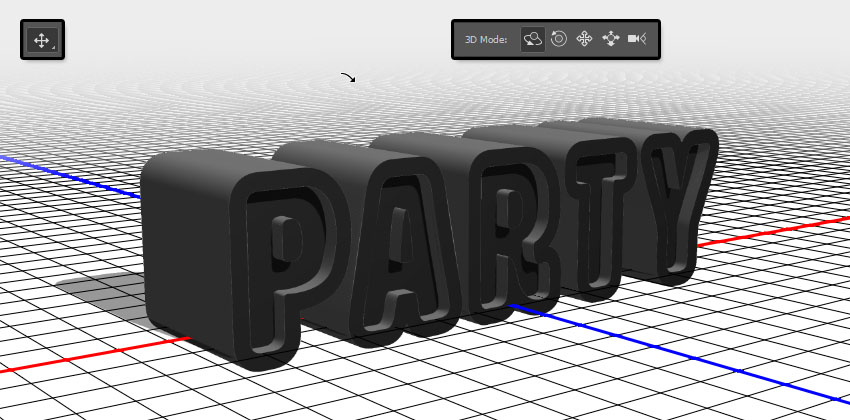
If you select the Move Tool, you’ll find a set of 3D Modes for it to the right of the Options bar.
When you choose one of those, you can then click and drag to perform changes (on the selected element in the 3D panel).
Use those modes to change the Current View into an angle you like.
5. How to Modify 3D Mesh Settings
Step 1
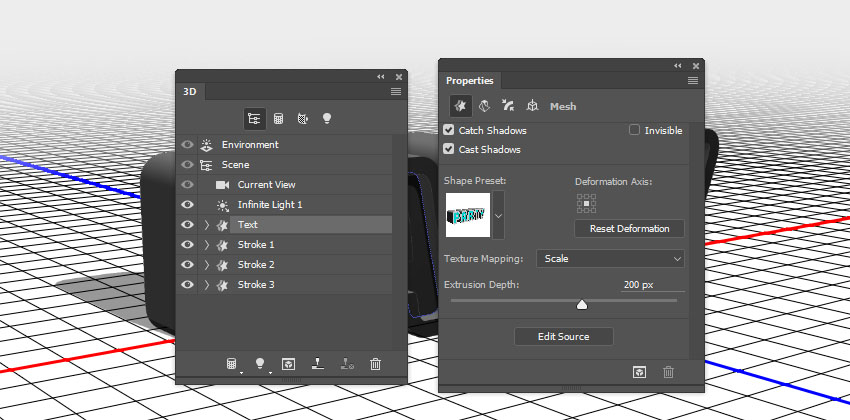
Select the Text mesh tab in the 3D panel, and then, in the Properties panel, change the Extrusion Depth to 200.
Step 2
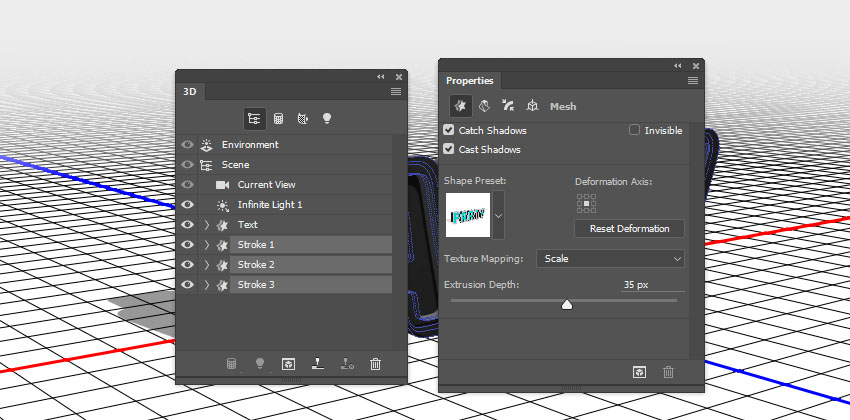
Select all the Stroke mesh tabs, and change their Extrusion Depth to 35.
6. How to Modify 3D Cap Settings
Step 1
Select the Text tab again. Then click the Cap icon at the top of the Properties panel.
Set the Sides to Front and Back, and change the Bevel Width to 5%, the Contour to Half Round, and the Inflate Strength to 10%.

Step 2
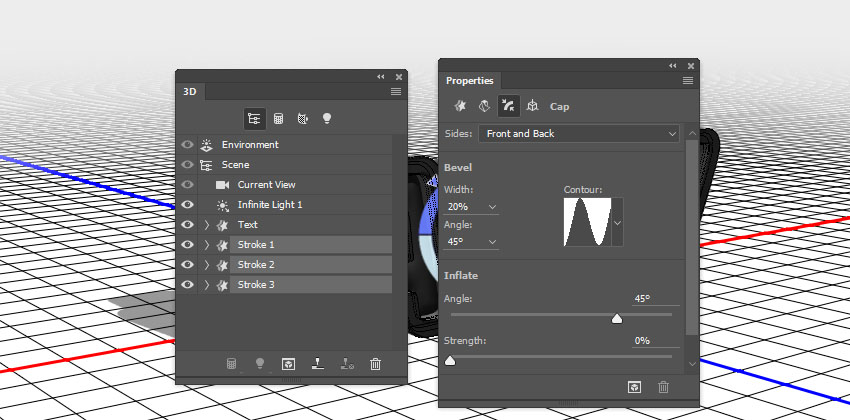
Select the Stroke tabs, set the Sides to Front and Back, and then change the Bevel Width to 20% and the Contour to Ring.
7. How to Reposition 3D Meshes
Step 1
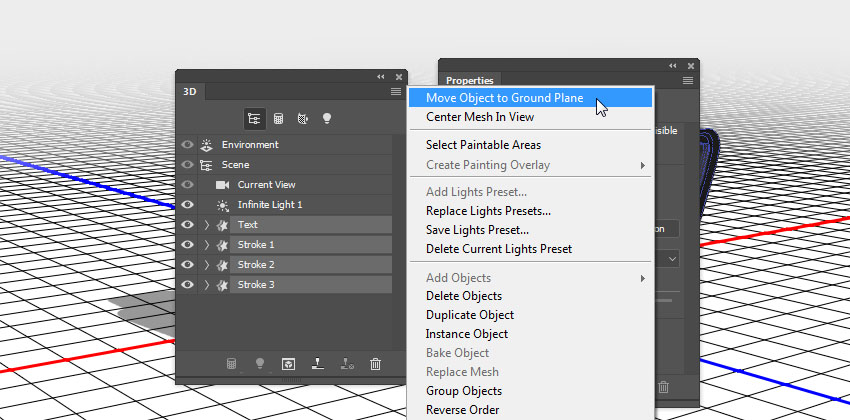
Select all the mesh tabs in the 3D panel, and then click the 3D panel menu icon, and choose Move Object to Ground Plane.
Step 2
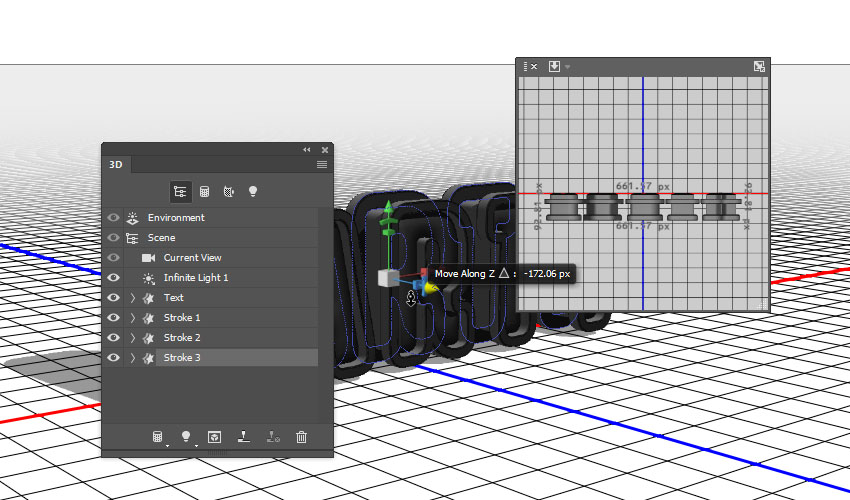
Pick the Move Tool, and use the 3D Axis to move the Stroke meshes apart from each other, and spread them over the 3D text you have.
The arrows at the ends of the axis move the mesh, the part below them is used for rotation, and the cubes are used for scaling. The cube in the center is used to scale the object uniformly. All you need to do is click and drag the part you want.
You can also open the 3D Secondary View window (View > Show > 3D Secondary View), and then click the little arrow to the left and choose the Top view, to better see what you are doing.
Step 3
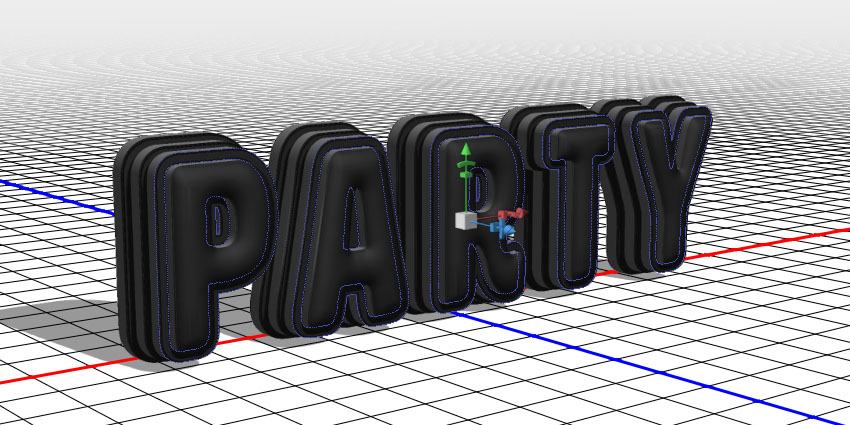
Make sure that the biggest stroke is at the back and the smallest is in the front.
8. How to Create a 3D Text Front Inflation Material
Step 1
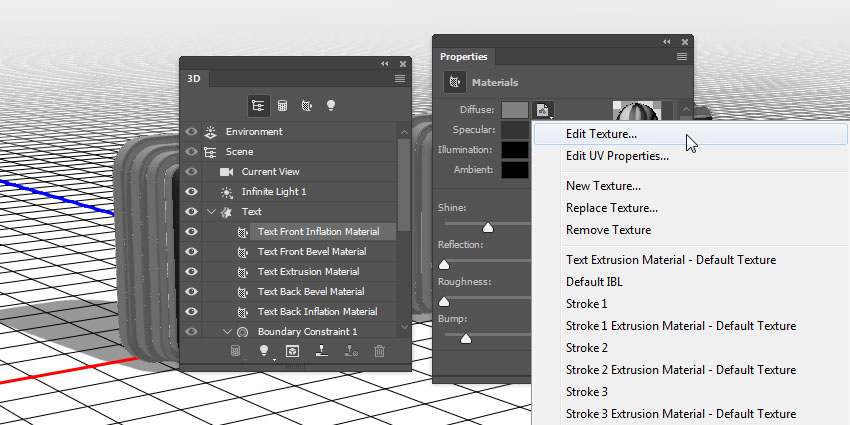
Select the Text Front Inflation Material tab in the 3D panel, and then, in the Properties panel, click the Diffuse texture icon, and choose Edit Texture.
 ��ǵ���
-
 Photoshop�������L�������ƬЧ����Ӣ��2018-04-23
-
 Photoshop�ϳ��L����������L�i¹��Ӣ��2018-04-23
-
 Photoshop�ϳɱ�����Ч�Ľ��~������Ӣ��2018-02-10
-
 Photoshop�ϳɉ����L���ɭ�ֈ�����Ӣ��2018-02-10
-
 Photoshop�ϳ�����ʩ��������Ӣ��2018-02-10
-
 Photoshop���������|�е�3D���w�֡�Ӣ��2018-01-09
-
 Photoshop�OӋ����ȼ��ˇ�g�ֽ̡̳�Ӣ��2018-01-09
-
 Photoshop�������L�������ƬЧ����Ӣ��
���P����11882018-04-23
-
 Photoshop�����@�G����3D���w��
���P����14682018-02-10
-
 Photoshop�������p���ع����w
���P����6532018-01-09
-
 Photoshop����ľ�ذ�LOGO��ӡЧ����Ӣ��
���P����19272018-01-09
-
 Photoshop���������|�е�3D���w�֡�Ӣ��
���P����4612018-01-09
-
 Photoshop�����Ż���M�ɵ�ˇ�g�֡�Ӣ��
���P����3802018-01-09
-
 Photoshop�����ɐ۵��ǹ���֡�Ӣ��
���P����6722017-12-25
-
 Photoshop��������Ү�d��߹ⱳ����Ӣ��
���P����6002017-12-16
